

Solar installers can’t provide accurate quotes without assessing your roof first, yet many homeowners spend weeks gathering estimates only to discover their roof needs work before panels can go up. Running through this checklist before contacting installers helps you identify potential issues early. You’ll know whether to address roof repairs first, plan combined projects, or move forward immediately. This advance knowledge can save thousands and helps you make smarter decisions about project timing.
Roof Age and Condition
Solar panels last 25-30 years, so your roof needs to remain sound throughout that period. Removing and reinstalling panels to replace roofing costs $2,000-4,000, money you’d rather not spend a decade into your solar investment. Different roofing materials have different lifespans. Slate lasts 60-100+ years, clay tiles 50-100 years, concrete tiles 40-50 years, and asphalt shingles 20-30 years. Metal roofing runs 40-70 years depending on material.
Apply the ten-year rule: if your roof needs replacement within ten years, do that work before installing solar. You’ll avoid removal and reinstallation costs while ensuring your roof and solar system age together. Check for warning signs. Missing, cracked, or curling shingles suggest deterioration. Heavy moss or algae growth indicates moisture retention. Sagging areas point to structural problems. Water stains on interior ceilings reveal active leaks that must be fixed before adding panels.
Structural Capacity
Solar panels add 2-3 pounds per square foot to your roof load. While modest, this becomes significant across a full installation, especially in snowy climates where winter accumulation increases total load. Most modern homes handle solar weight without issues, but certain properties warrant professional assessment: homes built before 1960, properties with previous loft conversions or roof modifications, any visible sagging or structural concerns, and flat roofs or unusual designs. Experienced installers like Solar Panels Leeds can quickly identify whether your roof needs additional engineering review.
If you can access your attic, inspect the rafters or trusses. Look for adequate spacing, typically 16-24 inches between rafters. Check for rot, water damage, or previous repairs. When in doubt, a structural engineer can assess load-bearing capacity for a few hundred dollars.
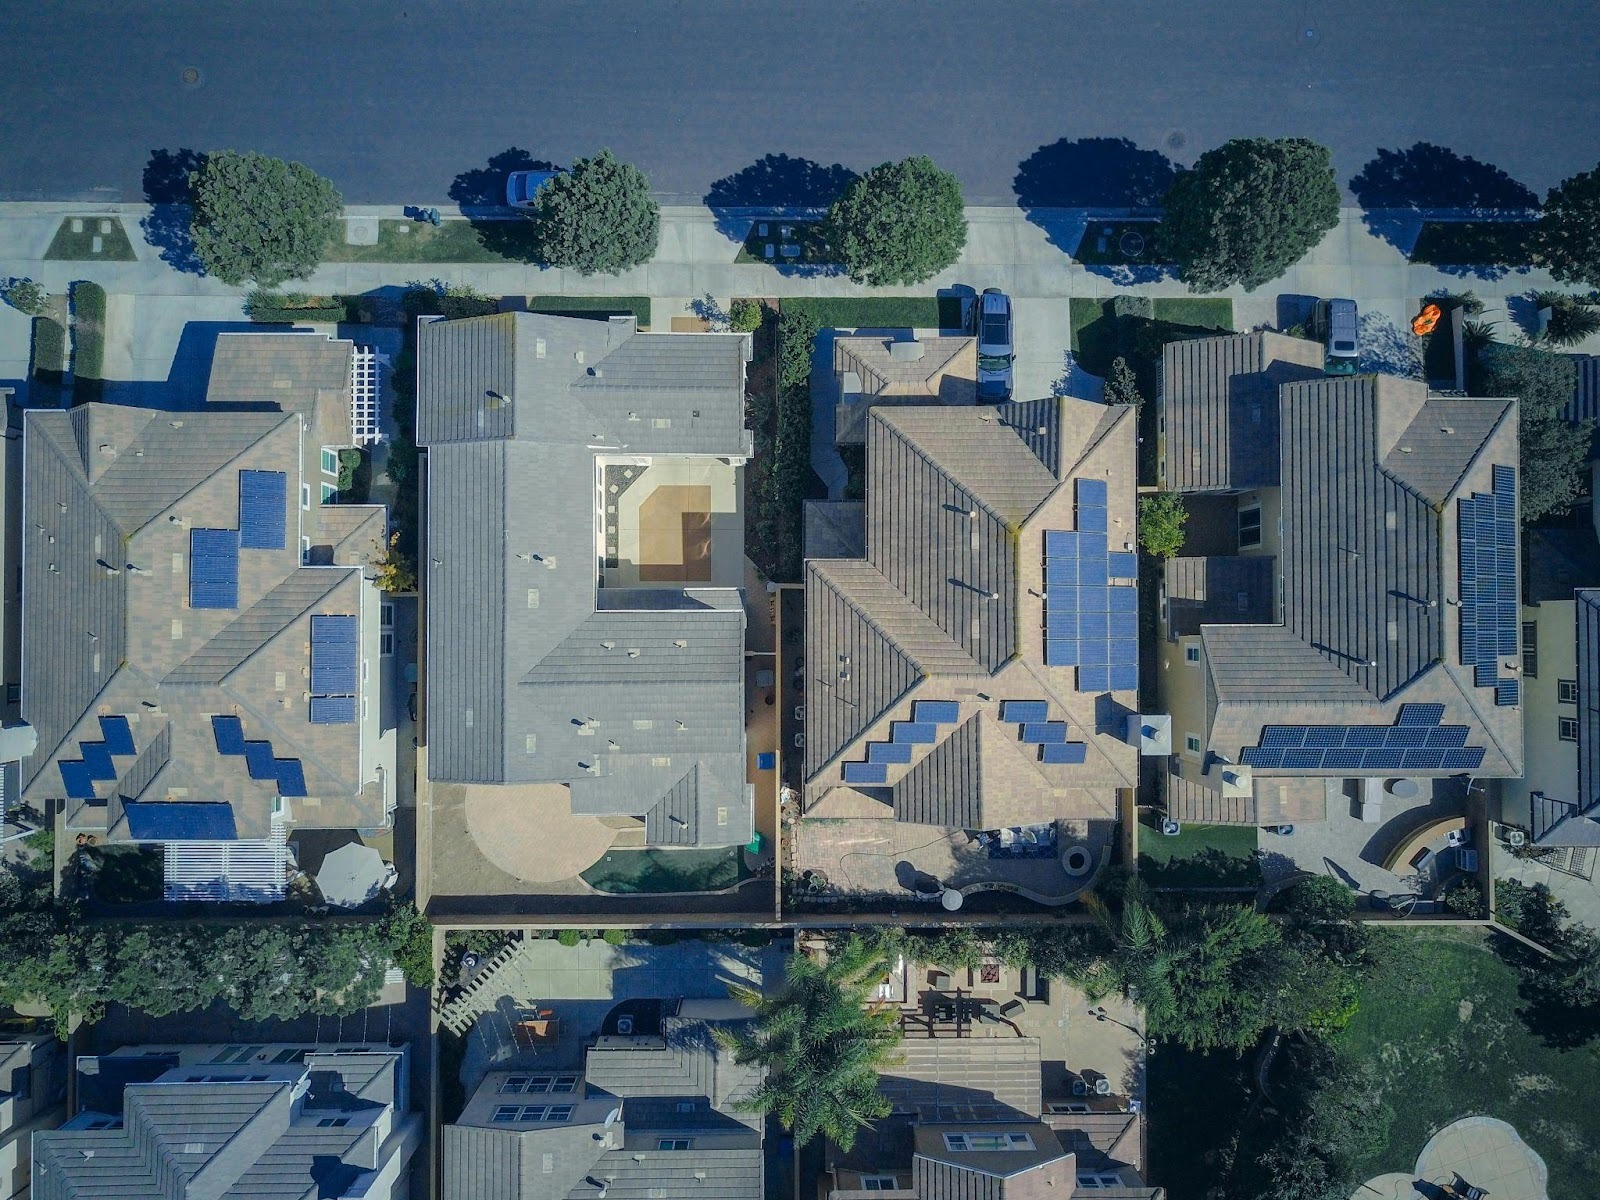
Roof Orientation and Pitch
In the Northern Hemisphere, south-facing roofs receive optimal sunlight throughout the day. In the Southern Hemisphere, north-facing roofs perform best. These orientations maximize energy generation and provide the quickest return on investment. East and west-facing roofs remain viable options, typically producing 80-90% of what optimal orientation would generate. North-facing roofs in the Northern Hemisphere (or south-facing in the Southern Hemisphere) produce significantly less and generally aren’t recommended unless you have no other options.
Roof pitch affects both installation complexity and energy production. The ideal angle sits between 30-40 degrees, closely matching the sun’s angle for maximum year-round generation. Roofs pitched between 15-50 degrees work well with standard installations. Flat roofs need mounting frames to angle panels properly, which adds cost but remains entirely viable. Very steep roofs above 60 degrees reduce efficiency and make installation more difficult and expensive. Even homes with sub-optimal orientation can achieve good results with proper system sizing and realistic expectations about output.
Shading Analysis
Shade dramatically reduces solar output, so identifying shade sources before installation matters enormously. Walk around your property at different times, noting what casts shadows on your roof. Trees represent the most common shade source. Neighboring buildings can block morning or afternoon sun. Chimneys and roof features create localized shade. Consider future development that might introduce new shade.
Timing matters. Morning shade has less impact than you’d think. Midday shade between 10am and 3pm proves most problematic. Evening shade creates moderate impact. If your roof receives direct sun for at least three to four hours during peak hours, solar remains viable. Modern technology like microinverters can mitigate partial shading, though they add cost.
Roof Material Compatibility
Most common roofing materials accommodate solar panels well, though installation approaches vary. Asphalt shingles, concrete tiles, and clay tiles represent straightforward installations. Slate requires careful handling but works well with experienced installers. Metal roofing uses clamping systems rather than roof penetrations. Flat roofs use ballasted mounting systems or frames that avoid penetrations.
Some materials create challenges. Very old or deteriorated roofing may break during installation. Wood shake roofs need special mounting. If your roof uses unusual materials, discuss compatibility with installers during consultations.
Access and Installation Logistics
Most installations require scaffolding or specialized equipment, adding $800-2,000 to project costs. Ground-level installations might not need scaffolding, saving money. Evaluate access to your roof. Narrow side passages can complicate equipment delivery. Densely built areas might require crane lifts. Shared driveways may need neighbor coordination. Overhead power lines can restrict equipment placement. These logistics rarely prevent installation but affect pricing. Difficult access means higher labor costs and longer installation times.
What to Do Next
If your roof passes this checklist, you’re ready for solar quotes. Contact multiple installers for site assessments and detailed proposals. Ask for written confirmation that your roof suits installation and inquire about warranties covering both panels and roof integrity. If you’ve identified issues like an aging roof, structural concerns, or shade problems, address these before requesting quotes. Consider combining roof replacement with solar installation for better pricing. When replacing your roof, ask about optimal materials for future solar installation.
Be honest with installers about concerns you’ve identified. Professional companies appreciate informed homeowners who’ve done preliminary assessments. This transparency leads to better proposals and prevents mid-project surprises. A proper roof assessment now prevents expensive problems later. Taking time to evaluate your roof’s readiness ensures your solar project starts on solid footing.


